A designated Project Administrator has the required permissions to create users, delete users, and set user rights for users.
They can view user logs, run tasks and define those tasks, (for example Copy Data and Copy Project).
Project Administrators can only make these changes for Projects when they have Administrator rights.
Administrator to a Project, however, will not be able to edit Project details or delete the Project,
The illustration below provides an example of the start menu.
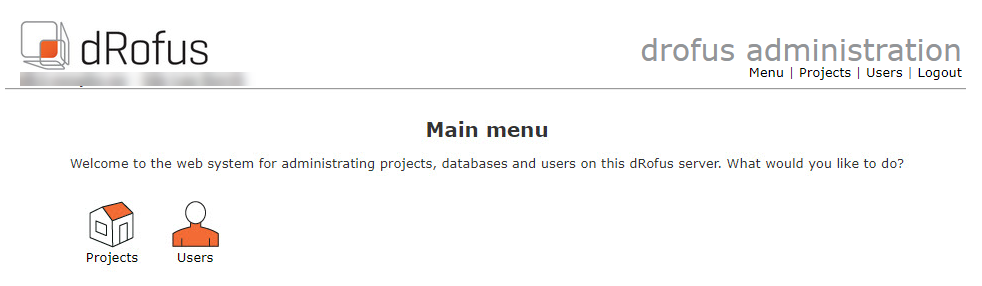
Projects
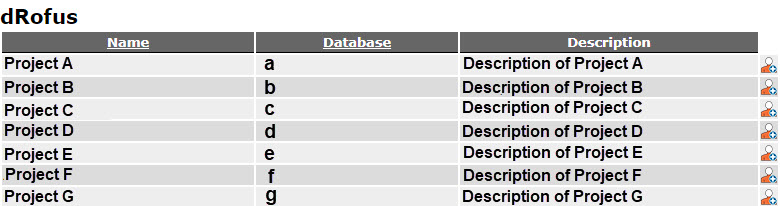
When a Project Administrator clicks on "Projects" from the start menu, the list of the Projects are the Projects they have administration permissions on. For each of these Project, they can create new users either by clicking on the Project name in the list or by utilizing short-cuts on the right of the area field "New user in project".
Users
When a Project Administrator selects Users from the main menu page they only see a list of users on the Projects they administer. They can search by name, user name and email address.
When they click on a user in the list, they will see information such as name, email and the Projects to which the user has access. From this window, the Project Administrator can add users for a Project to which they have Project Administrator rights.
They can choose the Project from the drop-down menu and click on the "Add new user" icon. They can also send a reminder in the form of an email, which provides a list of the Projects to which the user has access. They can also edit information of a user or delete a user by using the short-cuts on the right-hand side of the user list but note that they will not be able to edit or delete the user permissions if the user is also enrolled on other Projects not administered by the current Project Administrator.
When users are added to other Projects that are not Administered by the same admins, the users are protected from edits.
Add new user
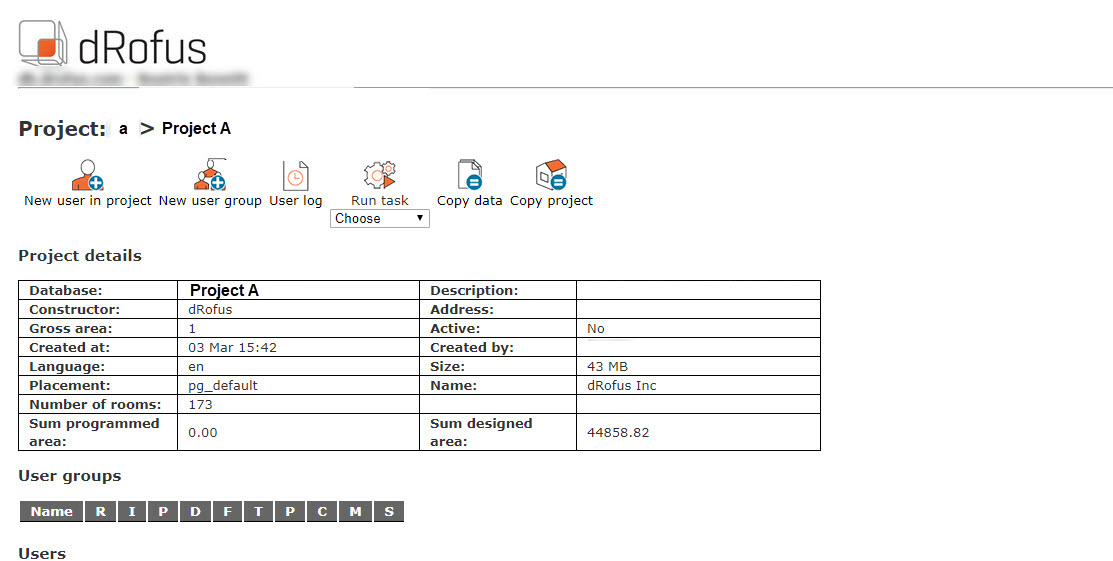
There are several ways of opening the "Add new user" window. The Project Administrator can get there from the list of Projects, by clicking on the short-cut on the right of the area field ( ![]() ), or they can click to open a Project and choose "Add new user to Project". They can also open the window via the user list by clicking on a user and adding them to the Project.
), or they can click to open a Project and choose "Add new user to Project". They can also open the window via the user list by clicking on a user and adding them to the Project.
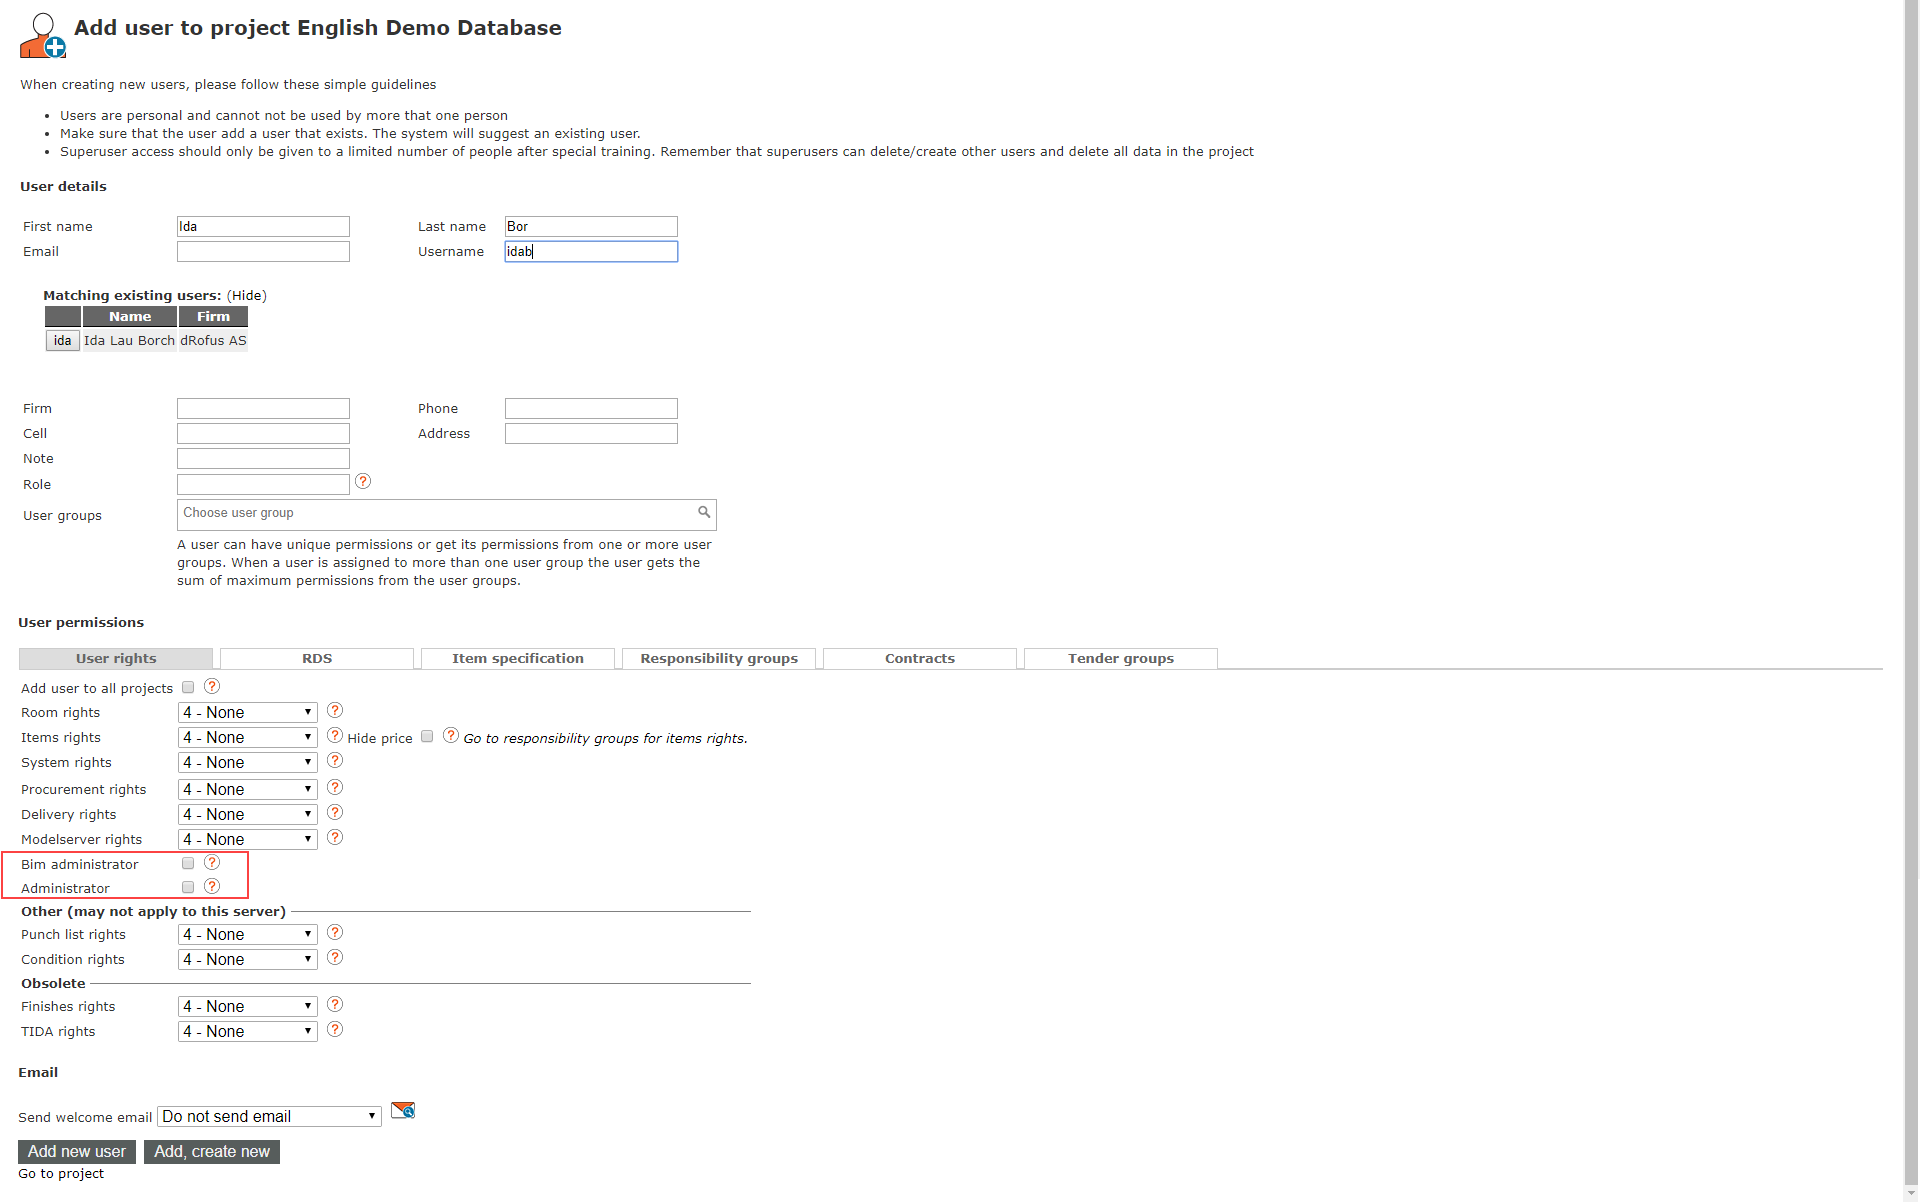
When creating new users, please follow these simple guidelines:
1. Username and email must be all lower case. Users accounts cannot be used by more that one person and should be unique per email.
2. Select from the automatically displayed user list if the user already exists. The system will suggest an existing user if you start to fill in matching user profile data. You will only see users that share Projects with you.
3. Administrator user rights should only be given to a limited number of people after special training. Remember that Administrators can add/remove other users and delete Project data from the admin site.
4. Enter the user information under User details. First name, last name and email address are obligatory. Emails can be used as usernames.
Note that the system automatically searches for users which match the name as it is typed in the form. If the new user being added already has a log-in for another Project, the program will display the user as an alternative under "Existing similar users". The system will also automatically generate a user name based on the information typed in for First name and Last name. This can be edited manually if required. If a user name already exists, an error message will appear at the top requiring a new user name.
User Permission Levels
The User rights function allows control of the individual rights of a user within the different dRofus modules. Hold the mouse cursor over the blue question mark to view help text explaining the different rights.
Level 4 - None means the user will not have any permissions and in most cases the module will not appear at all.
Level 3 - Read means the user will have read only access and non editing permission.
Level 2 - Limited means the user will have some editing permissions that can be refined based on other modules permissions (see sections below to define tab(s) within Item Specification, tab(s) within Room Data, Tender and Existing Items permissions)
Level 1 - Full means the user has full editing permissions.
Administration Levels
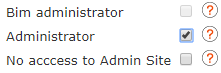
Bim Administrators have access to edit Attribute configurations in Revit and updating dRofus settings related to Revit/ArchiCAD.
Administrators have access to change settings and preferences in dRofus; they also have access to this system for managing users.
No access to Admin Site appears when Administrator is checked offering the option to limit access from the Project admin site allowing these types of admins access to the client admin settings, but not to user or Project administration.
NOTE
The interface in dRofus will change according to the modules to which the user has access to. Only assign access to modules a user needs to utilize.
If a database contains several Projects, there is an option to add the user to all the Projects sharing that same database. For information on creating a Project/database, go to Owner administrator.
When adding users, a Project Administrator can select an email format from the drop-down menu, based on the modules to which the user is to have access. The Project Administrator can also view a preview of an email, by clicking on the email icon.
When adding users, there are two final options. The Project Administrator can either choose to add the user and return to the user list in the Project, or they can choose to add and save a new user. Once they have made their choice, the system automatically sends an email to the user with log-in details. A copy of the email will be sent to all database administrators.
Modify Item rights for a user
Project Administrators define the access rights in the web administration page for each user. Click on the "Responsibility groups" or click "Go to Item rights detail" below the Item rights settings to set specific rights: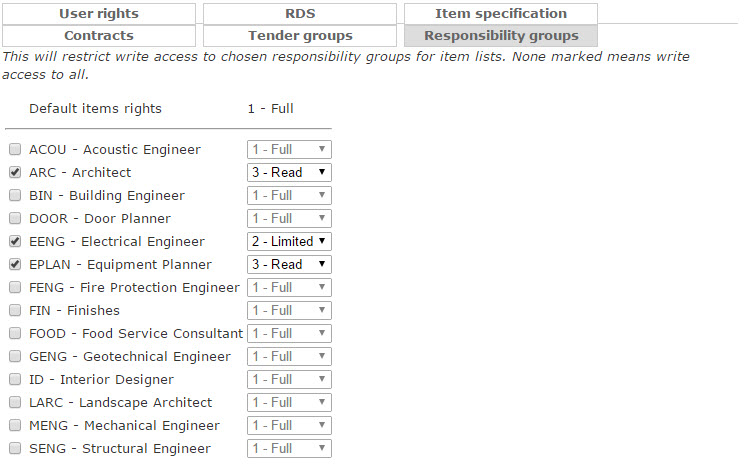
If a user is limited to responsibility groups this is also shown on the user:

Examples
If the intent is to prevent a user from modifying the item for responsibility group IT, but needs full access to edit all other items, they can give the user (default) Item rights = 1 (full), but limit the user to e.g. IT = 2. This means the user will have full access to work with all items, but are not allowed to modify type values on the item (e.g. specification, price, name etc.).
If the intent is to make sure a user is only working with items with responsibility group IT set the user settings as (default) Item rights = 3, but give full access = 1 for the IT responsibility group. This means the user is only allowed to create, modify and delete items with the IT responsibility group and also only add/remove these too rooms. This also means that the user e.g. cannot do operations on Item lists for rooms if this Item list contains other items than IT Item. E.g. cannot assign or remove a room template if this also contains ARC Item. This "hard" limitation therefore is probably most common to use in combination with separate Item lists that only contain IT Item (see Multiple Item List Types).
If the intent is to make sure a user can only see item with responsibility group IT set the user settings as (default) Item rights = 4 (no access), but give 1,2 or 3 to the IT responsibility group (depending if the user would like to work with, place or read only IT Item. This means that the user will not see any of the other items either in the item overview or in the room lists. Including those items without a responsibility group set (default is 4).
If the intent is to make sure to hide IT Item from a user there are two options – the first option is to set the user settings to let the user only see a selection of responsibility groups (like example above) or the second option is to set a (default) Item to either 1,2 or 3 and set IT access rights to 4.
Potential user rights issues
In some of the examples above the settings can not only limit the write access to some items, but also hide them from the user. This can lead to situations that are confusing for the user. For example if a user has access to all items but cannot see IT Item they are not allowed to for example delete an Item list for a room, even though it seems like they can edit all the Item in the room. So if a user profile is limited to some Items for some users it is recommended to put these items into different Item lists.
If a user has read only access to some item, but write access to others it can also be confusing if a user adds a sub-item with different responsibility groups. If for example a user does not have access to IT Item, but full access to ARC items, and the item the user is about to add/remove to a room has IT Item as subs and they are not allowed to remove it. Even though they have write access to the "parent" item, because this will also modify the count of an item they do not have write access to in the room.
If a user profile is limited to a responsibility group, this only means that they were not allowed to add any item with another responsibility group to an Item list in dRofus. But this was not a "strict" permission. So if the intent is to had full Item rights (=1) the user setting could be modified to limit the item to have the responsibility group they have access to and then add it to the room. Also there were no limitation to other operations on the Item list itself so the user could for example assign a room to a template or delete an Item list from a room, even though this list or template had items not in the same responsibility group.
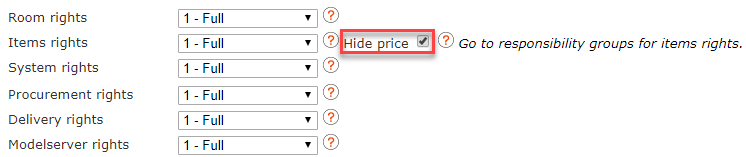
Prevent user access to Price-related fields
Within the Item Properties panel, there are three price-related fields - i.e., "Budget price", "Price date" and "Price Comment":
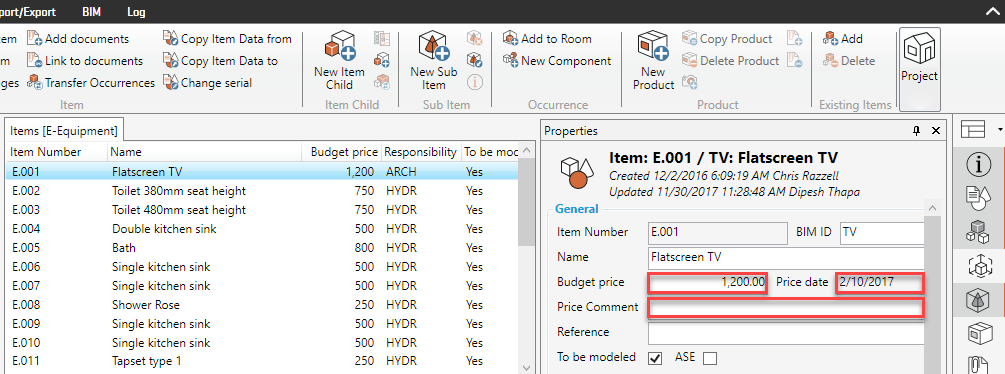
A user profile can be set to prevent a user's read or write access to these three fields by checking the box ""Hide price":
In other words:
If the User has "1 - Full" as Item rights, and the "Hide price" box is not checked, the User will be able to read + edit the price fields.
If the User has "2 - Limited" or "3 - Read" as Item rights, and the "Hide price" box is not checked, the User will only be able to read the price fields.
If the User had "1 - Full", "2 - Limited" or "3 - Read" as Item rights, and the "Hide price" box is checked, the User will not be able to read any of the price fields - i.e., they will be blank.
Limit user access to a tab in the item specification
A user profile can can be limited to write access to one or several tabs in the item specification. From the user access menu click "Item specification" and select which tabs the user should be able to edit. Note that if the user has 1=Full on Item, and is limited to one tab in specification, the user will no longer be able to change property data of the item (Names, ID's, Prices etc.).

Limit user access to a flag in Room Data
A user profile can be limited to one or several tabs in Room Data. First the user profile needs to be set to give the user 1=Full or 2=Limited access to rooms. Then from the user access menu click "RDS" and select which flag the user should be able to edit. The user will have read access to non-selected flags.
Limit user access on Tender groups
A user profile can be limited to one or several tender groups in the procurement module. First set the user setting to 1=Full access to the procurement module. Then within the "Tender groups" flag, click on the tender groups that the user needs access to.
User access to Existing Items
A user can create a register of existing items within the Existing Items module and associate (attach) these to pre-defined Items only if that User has Permission Level 1 to Responsibility Group for that Item. Once the Existing Item ↔ Item have been attached, Users will be able to allocate occurrences to Rooms for only those Items for which the User has Responsibility Group Permission Level 1 or 2.
Export to CSV (Users)
When viewing the list of Users within a Project, Project Administrators can carry out the "Export to CSV" command as follows. This will export user data to a CSV (comma separated values) text file which can be opened in Excel as a spreadsheet: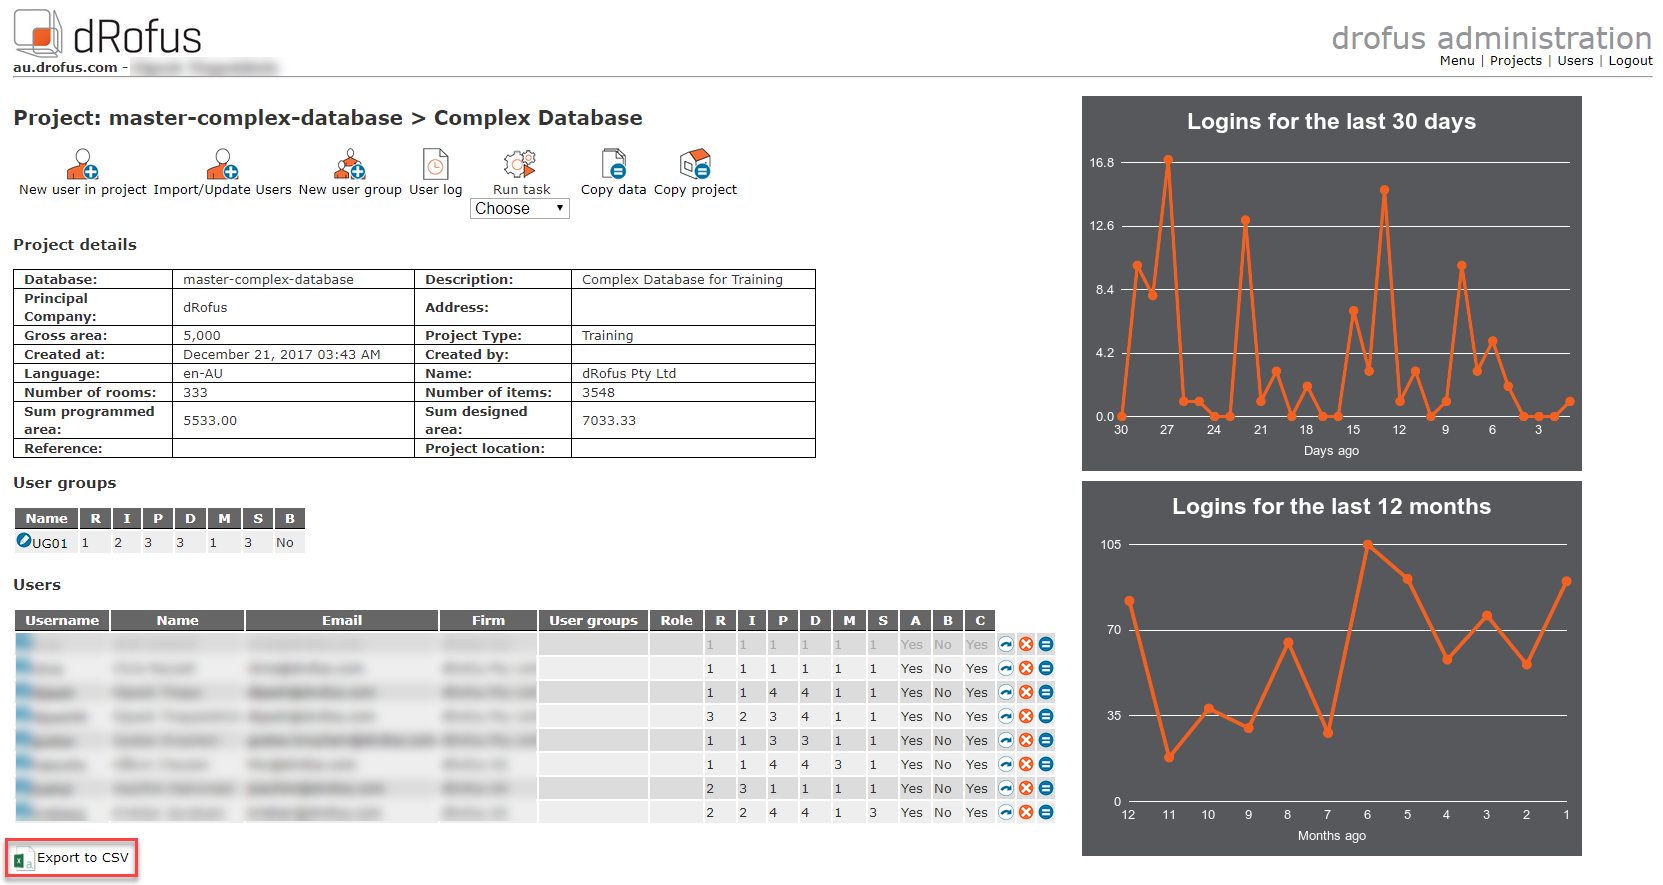
This enables the Project Administrator to view this list in Excel as well as any other tool that support CSV file types.