dRofus allows the database administrator to more easily manage user access and monitor usage.
Inactive Users
The section will display When a Project Administrator selects Users from the main menu page they only see a list of the users that have not logged in dRofus recently. It is possible to set the time frame (6 months, 1 year, 2 years or never logged in) using the select control at the top of the list.
Kick Out Users
...

User Permissions
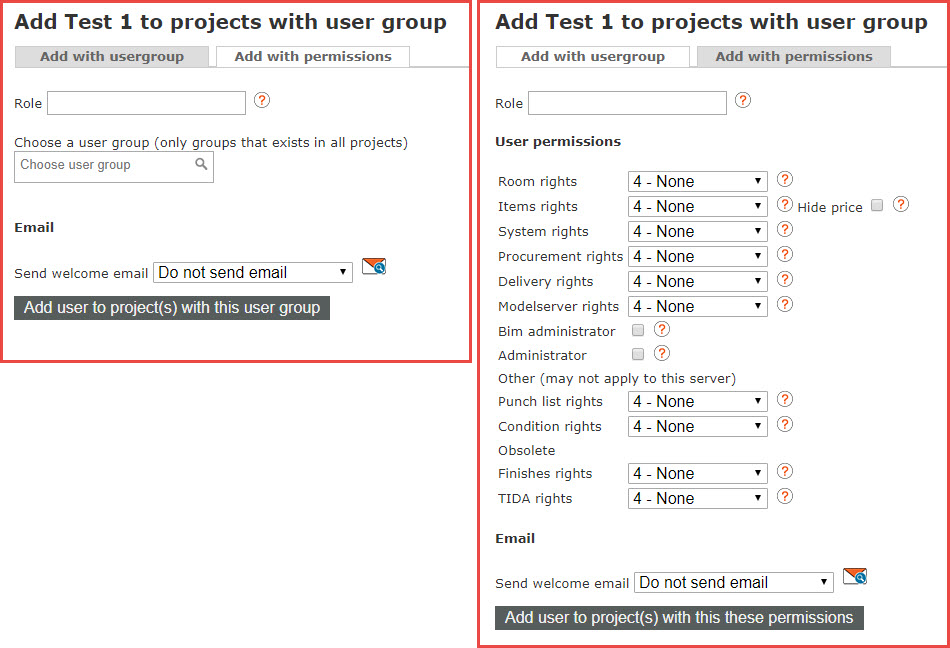
The User rights function allows control of the individual rights of a user within the different dRofus modules. Hold the mouse cursor over the blue question mark to view background text explaining the different rights.
Level 4 - None means the user will not have any permissions and in most cases the module will not appear at all.
Level 3 - Read means the user will have read only access and non editing permission.
Level 2 - Limited means the user will have some editing permissions that can be refined based on other modules permissions (see sections below to define tab(s) within Item Specification, tab(s) within Room Data, Tender and Existing Items permissions)
Level 1 - Full means the user has full editing permissions.users on the Projects they administer. They can search by name, user name and email address.
When they click on a user in the list, they will see information such as name, email and the Projects to which the user has access.
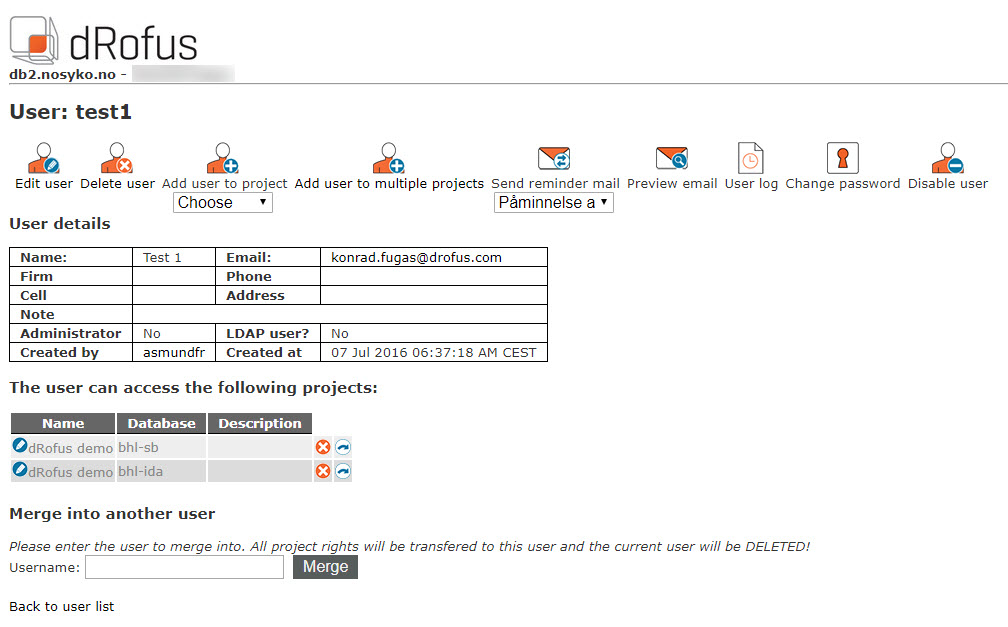
From this window, the Project Administrator can do as follows:
Edit user / Delete user
Administrators can edit information of a user or delete a user, but note that they will not be able to edit or delete the user permissions if the user is also enrolled on other Projects not administered by the current Project Administrator. When users are added to other Projects that are not Administered by the same admins, the users are protected from edits.
Add user to project
Add user for a Project to which you have Project Administrator rights. You can choose the Project from the drop-down menu and click on the "Add user to project" icon.
Add user to multiple projects
You can add one user to multiple projects. After choosing that option in the next window you will get all the list you have access as Project/Server Administrator. You can check all the projects you want that user to have access to and than click Add user to project(s).
In the next window you have a possibility to add user with user group permission, provided it exists in all of the chosen projects (more: User Groups). The user inherits permissions accordingly to what User Group means in each project (in other words: same user group name can have different permissions on different projects). Or you can choose specific permissions in second tab.
So you can specify role for a user and choose what welcome email the user should receive (you can preview the email by clicking the icon to the right).
Send reminder mail / Preview email
They can also send a reminder in the form of an email, which provides a list of the Projects to which the user has access.
User log
It is now possible to see a detailed user log, specific to a given user. By opening a user's detail and clicking on the "See user log" icon, the database administrator will be able to see when and with which client the user has recently logged in.
Change Password
Changing the user's password is now possible from the admin system too. The database administrator can change any user's password, but only temporarily – the user will be prompted for a new password at the next access – privacy is safeguarded.
Disable user
By clicking on the Disable User icon, the database administrator can revoke a user's access to the database. This means the user will not be able to log in to any of the projects residing on the database. When a user is disabled, his or her entry will be grayed out in the users list, and the Disable User icon will turn into an Enable User icon. By clicking on the Enable User icon, the administrator can grant the user access back to the database.