Type data values assigned to Items allow you to have consistent data for all occurrences (instances) of that Item Type in a Project.
Typically you might have several dozen parameter values assigned Typically, numerous parameter values are allocated to an Item Type, and some Item occurrences might differ certain instances of Items may deviate from the rest others in terms of some of the specific parameter values.
If you would like to record variances of your basic Item Types, you can use To capture variations of an Item Types Parent/Child relationships for Items in dRofuscan be used.
This allows you to create several approach enables the creation of multiple "Child Items" that are of belonging to the same "Type" as the Parent Item but can differ in some of their , while allowing differences in certain instance properties (eg. A "Round Rubber Balloon" (Item Type) might come in Red, Blue, or Yellow (Item Instance) in this case the Parent Item would be "Round Rubber Balloon," and the Child Items would be "Red Round Rubber Balloon", "Blue Round Rubber Balloon" and "Yellow Round Rubber Balloon")
Ribbon options for child items

The options available will depend on the item type you have selected. For example, you cannot apply the option Become child of to a child as a child cannot be children of two different parent items. Below is an explanation of the options in the ribbon menu;
- New item child: Creates a child item of the selected item.
- Overwritten values: Will only be active if you have selected a child. A Panel appears displaying all item data of the child which differs from the parent item.
- Become child of: Will only be active if you have selected a parent item. This option lets you take a parent item and create it as a child item for another optional item.
- Become parent: Only active if you have selected a child item. Detaches the child from its parent so that it becomes an "independent" parent item.
You can create a New Item Child from any Item by selecting it in the Item overview and selecting "New item child" in the ribbon menu.
- The New Item Child will share the first part of the Item number with its parent and initially copy all "core" data from the parent.
- E.g. name, but this information is not dependent on the parent and can be set unique for each child.
- Budget price is special as it will show as overwritten like item data when it is different than the parent.
- The new child Item will also be able to copy the current classification and status of the parent.
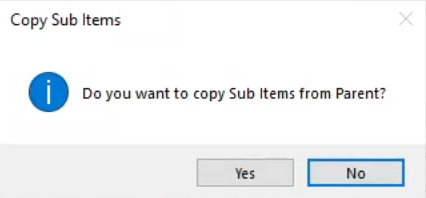
- After creating a New Child Item, a pop-up (see below) will appear asking if any Sub-Items associated with the parent to the child should be copied to the New Child Item.
The specification follows the parent, so the child will inherit any item data you set on the parent unless you overwrite/specify on the child (like derived Room Data). You can use this for infinite depth.
For example, if you have an office chair with different variants, you can create one parent Item and add specifications. You can then create children for the different variants you are using in the project. Any later updates to the description will be updated for all the children unless this value is overwritten on the child.

The specification is then inherited down so you can add general descriptions and or even the dimensions on the general chair. You can then give different widths for the children and the grandchild, you can overwrite some additional data . Example using a Chair as parent Item:
...
| Child pages (Children Display) |
|---|
Item data
The child Items inherit the specifications from their parent, meaning they will adopt any item data assigned to the parent unless it is specifically overridden or specified for the child (similar to derived Room Data). This inheritance can be extended to an unlimited depth, allowing for versatile customization.
For instance, an office chair with various variants. Instead of creating separate Items for each variant, a single parent Item can be created and define the specifications. Subsequently, child Items are created for the different variants used in the project. Any modifications made to the description will automatically apply to all the children, unless a specific value is provided for a particular child, thereby overriding the inherited data.
...
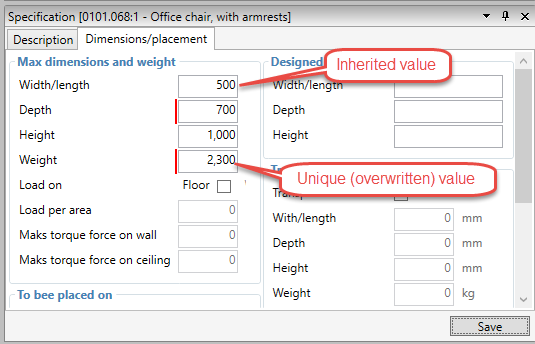
The specification is then inherited down. Different values can be added to the children and additional data can be overwritten from either the parent or grandparent thus creating different variants. When looking at the Item overviewdata, you will see the inherited values will be displayed as normal values, and the unique values for the child will be marked by a red line. If you When hover your the mouse over any inherited values, you will see from what the values from the parent Item will be displayed the value is from (parent, grandparent, great-grandparent etc).
...
It is possible to remove a unique value for a child Item and instead let the value be inherited you can click on the "Overwritten values" button in the ribbon menu. Check the overwritten value you would like to clear and press delete; : Read more Display and edit Overwritten Child Items data
Linking Revit families to items with children
When using parent and child Items, this can also be used to support many to many relationships between dRofus and the model (Revit/ArchiCAD):
In dRofus, it is possible to include more type detail than
what you havein the Revit/ ArchiCAD model. E.g.
if you want variationsVariations of a laboratory bench where the benches have the same geometry but diverse specifications and thus diverse prices,
you can splitthe bench can be splitted into several child-versions in dRofus, and so have the correct version showing up in
yourthe reports, budgets and procurement considerations. At the same time, in
yourthe model, you
maywant to keep the generic object; just link the parent Item in dRofus to the family type and there will be no conflict when synchronizing the objects from the model (Revit/ ArchiCAD) to dRofus, as long as the count of Items in dRofus is the same as the count of objects in the model.
You can do the opposite; also, that is, to have a higher level of type detail in the model than in dRofus. E.g. if you have different colors on an object (as type information), but for checks with dRofus you only would like to compare count and ensure it is in the correct rooms. You then create the different variants as child Items in dRofus and link the child items to the model, but in dRofus you place the generic parent object in rooms.
See the user manual for the different add-ons and on how to do this with the add-on.
Swap Parent Item with Child Item in Items lists
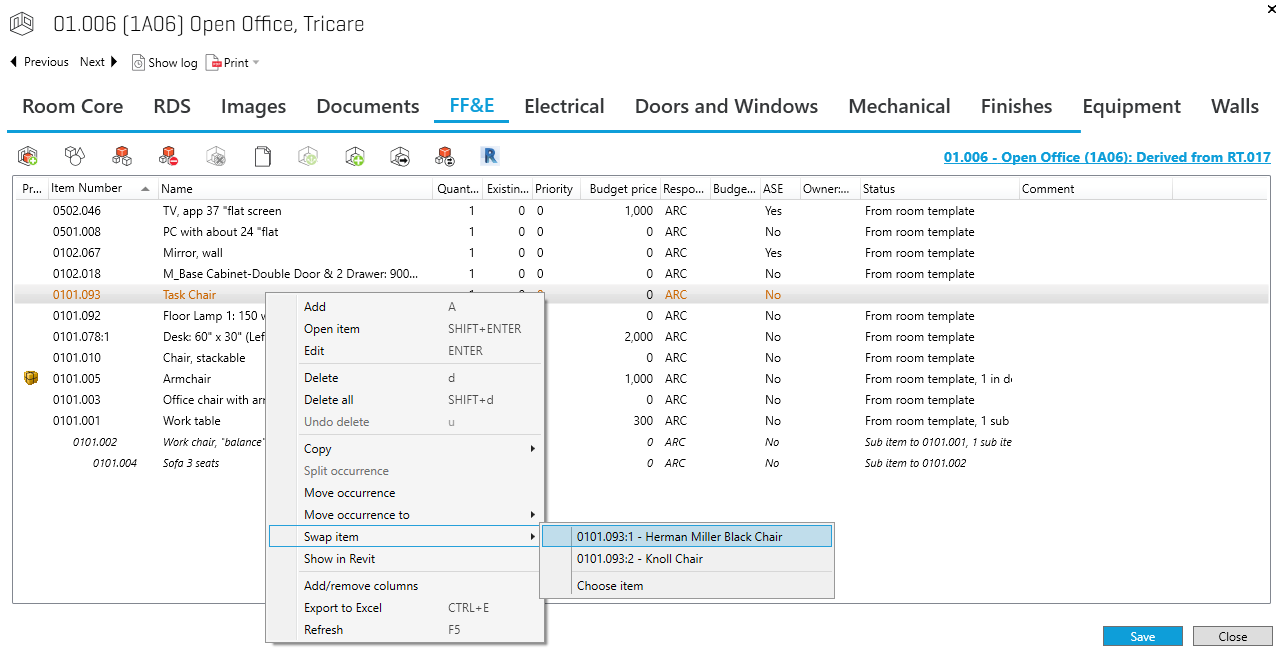
When using a parent Item in Items list you can easily swap between the parent used to its child's (or any other Item). You can do this in "Items in Room" or from the occurrence list in the Item overview. You will only be allowed to swap Item's is derived and unique Items lists.
To swap an Item right-click on it and select "Swap Item". If the Item has child Item's they will be displayed in the menu for easy access. If you want to swap with another Item select "Choose Item". If you wish to create a new child Item select "New Item child".
Importing Child Items from another Project via spreadsheet
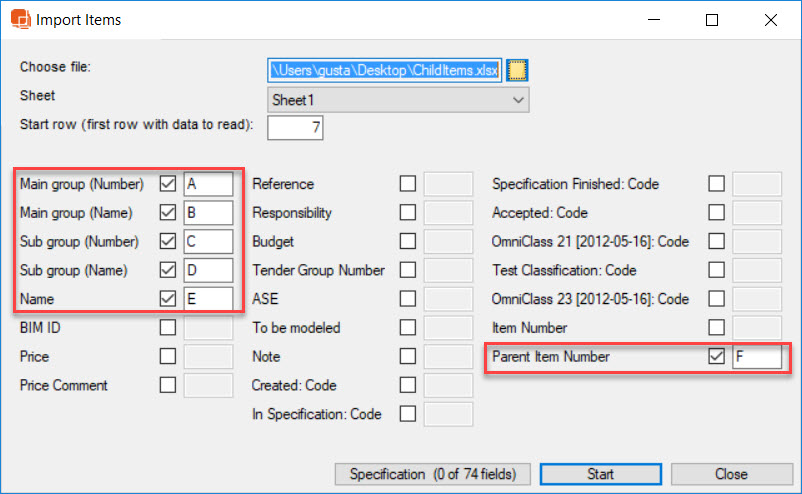
If you have created Child Items in another Project Database that contains the same Items and Coding then you can export the child items associated with Parent Items to spreadsheet and import them back into another Project Database using the Item Number to identify the Parent. Refer to illustration of Import Panel below (mandatory fields are highlighted):
 Read more: Create new Child Item in dRofus and link to Family Type